|
How to reposition a SiroTIFF image |
Reposition SiroTIFF

To access this dialog:
-
run the command 'reposition-sirotiff' from the command line, or use the "rst" quick keys. Sirovision must be installed on the host system.
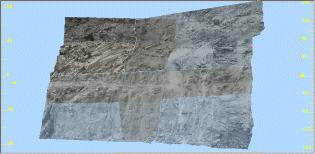
Because it is not always possible to georeference Sirotiff objects at the time of creation, you can manually georeference the object using other loaded data items as a reference. This task is handled by the Reposition SiroTIFF dialog.
It is important to note that this dialog runs alongside other functionality in Studio 3. Views may still be manipulated, and other commands and functionality used as normal during the SiroTiff repositioning process.
When the dialog is started, you are prompted to select a SiroTiff wireframe. This is done interactively in the Design or 3D views by clicking the cursor on the required wireframe. If the selected wireframe is not a SiroTiff file, you will be prompted to reselect.
You can only perform a rotation around the Z-axis with this function - if any combination of edits are performed that require rotation around the X or Y axis, you will be informed that this is not possible until the file is reloaded or refreshed.
Once the SiroTiff wireframe has been successfully selected, the controls in the Repositioning part of the dialog will 3D enabled; these can be used to carry out basic repositioning tasks for the wireframe. Alternatively, existing controls/commands in the Design and VR view may be used to reposition the wireframe.
|
|
The buttons on the 3D window's Move commands may also be used to interactively move the selected SiroTiff in the 3D view (wireframes cannot normally be moved using this tool). |
The controls within the Repositioning part of the dialog may be used in any order, multiple times, or not at all.
For more information on a particular command, check the inline message box at the top of the dialog; this shows contextual information relating to the task you are performing.
Field Details:
Choose New Reference Point: click on the wireframe in the Design View or 3D View to specify the new Reference Point. The initial Reference Point will be the point on the wireframe which was clicked during SiroTiff selection. This may be changed at any time by clicking on the Choose New Reference Point button, then clicking on the SiroTiff object at the new required point in the 3D view.
Move To: the Move To command will reposition the SiroTiff so that the Reference Point falls at the user-specified location. There are 2 ways of specifying the new location of the SiroTiff.
-
The coordinates of the new location may be explicitly entered into the X, Y and Z edit boxes and then applied by clicking on the Apply button.
-
The new location may be chosen by clicking on it within the view, which will also apply the move automatically.
|
|
If you are translating a SiroTIFF wireframe by a significant virtual distance, it is possible the rounding operations within the translation process may cause the texture to become distorted. If this happens, it can be easily rectified by right-clicking the 3D icon in the Sheets project control bar and selecting Redraw All. |
Move By: the Move By mode allows the SiroTiff position to be moved incrementally by fixed amounts along the X, Y and Z axes. The required displacement may then be entered into the X, Y and Z edit boxes and then applied by clicking on the Apply button. To allow multiple corrections, the dialog will remain in Move By mode until the mode is exited by toggling the Move By button, or choosing another mode.
Rotate By: the Rotate By mode allows the SiroTiff position to be rotated incrementally around the X, Y and Z-axes. The centre of rotation will be the previous specified Reference Point. The required rotation may then be entered (in degrees) into the X, Y and/or Z edit box and applied by clicking on the Apply button. To allow multiple corrections, the dialog will remain in Rotate By mode until the mode is exited by toggling the Rotate By button to disable it, or choosing another mode.
Save New Position: this button is used to write the repositioned Sirotiff data back to the original file.
|
|
Related Topics |
|
|


